More on Toning
Instead of an assignment this week, I want to go more into toning images. I began this discussion with How-To: Split Toning. Those methods worked very well, but I felt that I was limited by the variations command. So I've done some more research.
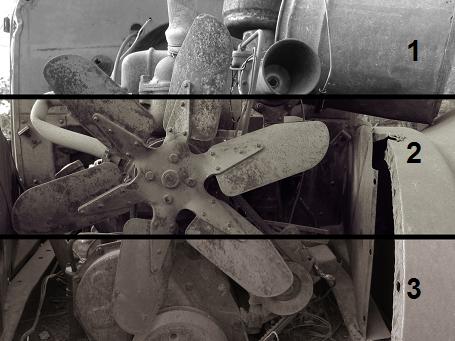
1: Original
2: Quadtone
3: Selenium
This article will teach you how to do each of these adjustments, and more.
This article was a big help. He suggests using curves to achieve the toning effects, and he also notes that you can save your curve adjustments. To get to curves, you can either go to Image > Adjustments > Curves or to Layer > New Adjustment Layer > Curves. There is a dropdown menu there which will let you pick individual color channels, i.e. red, green, and blue. This will normally take a lot of experimentation, but when you're finished you can click on "Save" in the Curves dialog and it will allow you to save the exact effect you've used here to use it again another day.
But if you're impatient, or you just want to be smart and use what others have done as long as they've done it well, you might want to use Curves files that others have created. That page has a zip file available with eight different Curves adjustments, including a selenium tone (which is what I was originally looking for and led me to that page), a nice-looking subtle sepia-like tone (which he calls Rustica1), and others. (By the way, I believe Ansel Adams was known for using selenium tones.)
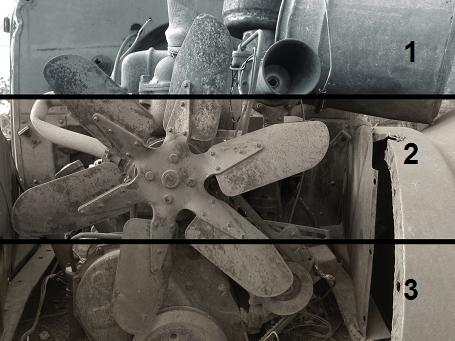
1. Thomas Niemann Tones Silver
2. Denny Wagner Platiunum
3. Ken Lee Bronze Balanced

Rustica 1, Rustica 2, and Rustica 3
You can find other files which will allow you to do the same kinds of things on The Photoshop Action Exchange. There are also many other actions available there (such as one that mimics infrared film, but I had trouble with that one) for you to peruse. To use an action, you must go to your actions palette (hit the actions tab in your history palette). To load one you've saved, click the menu (the little tiny circle with the arrow) and click "Load Action." Then click on the action you want and press the Play button.
Using Curves is probably the most sophisticated method for toning a photo. But there are others. This article explains one of them. You may have to go to Image > Mode > Greyscale, and after that you must go to Image > Mode > Duotone. From here you can select Duotone, Tritone, or Quadtone. Select a tone that sounds good, and try it out. If you don't like it, hold down Alt and then click on Reset. Once you find one you like, choose it and you can adjust the curves if you want. After you're done with this method, you'll have to go back to Image > Mode > RGB if you want to save it in JPG format.
But remember that toning will never make a bad image into a good one. It can only enhance already good pictures or bring out the hidden potential of latently good images.
You sepia tone a bad print, and what you get is a bad sepia toned print.--Linda Cooley
Remember that when you've tried these methods out, you should share them with the group!
posted by Full Metal Attorney @ 8:36 AM
0 comments
![]()

0 Comments:
Post a Comment
<< Home